

TRAIN HARD
TRAIN NOT JUST TO GET IT RIGHT…TRAIN ‘TIL YOU CAN’T GET IT WRONG.
TRAINING TIPS
- There are many great books, videos, websites and classes available for the AR. The Redcat is an ideal companion for all of it!
- The RedCat adapts. Use it in your garage, while fast-roping off of a helicopter, or anything in-between.
- Use a timer so you can track your progress.
- Always follow the basic rules of firearm safety: assume every gun is loaded, always point in a safe direction, finger off the trigger, know your target and what’s behind it.
- Even though the RedCat renders the rifle inert, NEVER substitute dummy rounds with live rounds.

Click here to go to the homepage and review the RedCat intro videos showing the basics of dry fire training, dry fire training with the RedCat, install and removal, and how the RedCat works. Use the link there to return to this page.
BEFORE YOU START:
BASIC
Welcome to “RedCat 101!”
This training is broken into seven sections to help you become safe and confident when you use the AR-15 platform. It’s designed for any skill level and all focus areas.
Each drill is broken down into seven sections: PURPOSE, GOAL, SET-UP, PROCEDURE, STANDARDS, FIRST ATTEMPT and MASTERY.
Nearly all of these drills require the same equipment to accomplish. Your rifle, the RedCat, magazines, dummy rounds and a timer. Targets are nice to have, but optional because you can substitute with objects around you. Later in the series there are a handful of drills with specific focus that require additional items such as a sling, magazine pouches, a belt, a holster and a pistol. If that’s not your focus, no need to worry about it. If it is your focus and you don’t have the equipment, substitute or tailor the drill until you get the equipment.
Safety first and always. Start with the four basic rules of firearm safety:
-1 Assume every gun is loaded.
-2 Always point your rifle in a safe direction (muzzle discipline)
-3 Keep your finger off the trigger.
-4 Know your target and what’s behind it.
These rules are critically important even when dry firing. Review them on a regular basis. With the RedCat installed the rifle is inert…but you should always train as if it’s not. If you miss something there’s no “undo” button on a firearm and these rules keep a mistake (we’re not immune from mistakes) from turning into a tragedy.
Technique then speed: What good is your training if you’re just fast? Speed without technique makes you less effective…and even dangerous. Review this and other training materials often for proper technique. Increase speed only after you understand and can apply the correct technique.
What is your goal? Are you a beginner wanting to learn the basics to safely operate on the range? Are you a competitor wanting to increase your speed and accuracy? Are you an instructor wanting to safely train in a group setting? Are you an operator wanting to maintain your edge or add a little more safety and realism to your rehearsals? Whatever your goal is, make sure you define it up front and use it to guide you through your training.
On your early attempts set an achievable par time and concentrate on proper form. As you get better, decrease the time while still maintaining proper form until you meet the time standard for mastery.
One last thing…make sure you keep your rifle clean and functional…that’s not the same as shiny and new. The AR platform is a tool and it’s gonna get dirty and scratched up as you put in the hard work…which, if we’re being honest, looks way better than a custom “battle worn” paint job anyway.
Good luck and remember…train hard and stay safe!
CORE DRILLS:
Start with these core drills and master them with repetition. They will familiarize you with the RedCat and provide a strong foundation for you to be an excellent shooter.
DRILLS:
BASIC
PURPOSE (why you are doing this drill): Run through and learn the basic function of the RedCat.
GOAL (what you will accomplish): Create the basic muscle memory of the live fire sequence of the AR platform using the RedCat so the controls operate just like they would with live rounds.
SET-UP (the equipment you will need): Rifle with the RedCat installed. Shot timer (optional). Three targets in a row 10ft – 20ft away.
PROCEDURE (the drill itself): Start facing the targets, with the rifle on “SAFE” and pointed down in a safe direction (the “low ready” position). Slowly bring the rifle to bear on the first target, As you raise the muzzle, switch the safety selector to “FIRE.” Engage the three targets. When finished, lower the rifle back to low ready. As you lower the rifle, switch the safety selector back to “SAFE.” Repeat this basic exercise over and over to build muscle memory and familiarize yourself with how the RedCat works.
STANDARDS (what to look for as you perform the drill): 1. As you raised the rifle, did you switch the safety selector to fire? 2. Did you engage all three targets? 3. Did you re-engage the safety as you lowered the rifle? If you answered “no” to any of these, slow down and/or practice each standard individually until you get it right.
FIRST ATTEMPT (how to set up for the first time): Don’t worry about the timer at first. Start slowly and just concentrate on proper technique. Once you get the hang of it, set your timer for ten seconds and concentrate on proper from. As you learn the drill reduce the time on the timer.
MASTERY (the final standards to demonstrate proficiency in this drill): Perform this sequence correctly in under three seconds ten times in a row. Use a shot timer or an interval timer and set the par/work time to three seconds to confirm.
PURPOSE: Highlight the advantage of training with the RedCat in a slightly more complex scenario.
GOAL: Use the RedCat to create the foundation for more advanced drills tailored specifically to your goals.
SET-UP: Rifle with RedCat installed. Shot timer (optional). Two sets of two targets in two rows 15ft – 30ft away. Position each set of targets about 15 ft away from each other.
PROCEDURE: With the RedCat installed, start facing the targets, with the rifle on “SAFE” and at the low ready. As you bring the rifle to bear on the first set of targets switch the safety selector to “FIRE.” Engage the two targets. Switch the safety selector to “SAFE” as you transition to the second set of targets. Once transitioned, switch the safety selector to “FIRE.” Engage the second set of targets. When finished, switch the safety selector to “SAFE” as you bring the rifle back to low ready
FIRST ATTEMPT: Don’t worry about the timer. Start slowly and just concentrate on proper technique. Once you get the hang of it, set your timer for ten seconds and concentrate on proper from. As you learn the drill reduce the time on the timer.
STANDARDS: 1. As you raised the rifle, did you switch the safety selector to fire? 2. As you transitioned, did you did you use the safety switch? 3. Did you engage all four targets? 4. Did you re-engage the safety as you lowered the rifle? If you answered “no” to any of these, slow down and/or practice each standard individually until you get it right.
MASTERY: Performing this sequence correctly in under four seconds ten times in a row. Use a shot timer and set the par time to four seconds to confirm.
VIDEOS:


PRIMARY DRILLS:

The CORE and PRIMARY drills work together to provide a foundation for training on the AR platform. Master these two sets of drills first to supercharge your skill level.
DRILLS:
BASIC
Remember the movie Karate Kid? After days of “paint the fence” “sand the floor” and “wax on wax off,” Daniel-San is asked by Mr Miyagi to show him what he learned…and the deeper meaning these mundane tasks is revealed: true mastery only comes from proper technique, repetition and hard work.
The PRIMARY drills are all about proper administration of the rifle. The historical term dating back to the 18th century is “manual of arms.” A manual of arms is simply an instruction book for handling and using weapons in the military. It includes a break down of the steps needed to load, ready and fire the weapon. Today, the Army uses a 9 series TM (Technical Manual 9-1005-319-10) for the M-16A3 and M-4 Carbine.
The tasks outlined here are mundane but if you invest the time your skill will grow rapidly in all areas. As you advance, use the PRIMARY drills as a warm up and to maintain your readiness.
PRIMARY 1 is the load and unload sequence. The task is simple but attention to detail and repetition is essential.
There are two reloads on PRIMARY 2. When you set up, you’ll keep the bolt locked back to simulate running out of ammo for the first reload–where you’ll need to release the bolt to chamber a round. The second reload simulates what happens before you run out of ammo and have time for a fresh magazine. In this case, a round is already chambered so there is no need to release the bolt after reload.
Note: locking the bolt back on set-up is not what you would normally do during live fire…but is necessary for this drill to simulate releasing the bolt after a reload.
The PURPOSE: Practice loading and unloading the rifle.
GOAL: Make the administrative (manual of arms) tasks of the rifle second-nature. The less you need to think about these tasks the more situational awareness you will have as you advance. This drill may seem a little tedious but…trust me…master this drill and you will set yourself apart from the rest of the crowd.
SET-UP: You need your rifle with the RedCat installed, one magazine with dummy round(s) and a timer. Place the rifle and magazine on a table in front of you. Use multiple magazines with multiple dummy rounds to reduce the set-up time between drills.
TIP: Set up the drill so the rounds don’t roll away too far as they eject. You don’t want to spend too much time searching for them.
PROCEDURE: At the buzzer, pick up the rifle and confirm safe. Pick up and insert a magazine into the magwell and rack the bolt. Close the dust cover and the rifle is loaded. Bring the rifle to bear, switch to “FIRE.” Place two rounds into an imaginary target in front of you. Switch to “SAFE.” Now for the UNLOAD: Press the Mag Release to release the magazine and pull the charging handle back to empty the chamber. Observe the round ejecting and verify the chamber and the magwell are clear. Release the charging handle and close the dust cover. The Rifle is now unloaded.
WARNING: Always remember, when unloading, remove the source of ammunition first. If you reverse the order, you’ll still eject the round from the chamber but a new round will load in its place and remain there after you remove the magazine.
STANDARDS: 1. Was the magazine fully seated? 2. Did you pull back the charging handle, to successfully load a round? 3. Did you release the charging handle without riding the bolt forward? 4. When unloading, was the first step to remove the source of ammo? 5. When unloading, did the magazine drop as you pressed the mag release? 6. Did a round eject as you pulled the charging handle? 7. Is the chamber empty after unload? 8. Is the dust cover closed? If you answered “no” to any of these, slow down a bit and practice each standard individually until you get it right. If you answered “no” to standard 4, you’re creating a dangerous situation…take extra time to get the order right.
FIRST ATTEMPT: Before you time yourself, concentrate on proper technique and make sure you don’t miss a step (especially when you’re unloading). Once you get the hang of it, set your timer for 45 seconds but continue to concentrate on getting the sequence exactly right. If you are using an interval timer and only one magazine with one dummy round, set the rest time to 30 seconds or more to give you time to set up for the next drill. If you are using multiple magazines and/or multiple dummy rounds set the rest time to 20 seconds or less.
MASTERY: Perform this sequence correctly in under 15 seconds ten times in a row. Although the rest time is not counted you should try to reduce it to 10 seconds or less, especially if you use multiple magazines and dummy rounds.
Good luck, and always remember, train hard and stay safe.
PURPOSE is very simple: Practice reloading the rifle.
GOAL: Same as PRIMARY 1, make the administrative (manual of arms) tasks of the rifle second-nature.
SET-UP: Rifle with the RedCat installed, three magazines with dummy round(s) and a timer. For the extra magazines, you can either use a belt with mag pouches or just lay the magazines on the table. Before you lay the rifle on the table, lock the bolt back and lock the charging handle forward, then verify the chamber is empty and insert one magazine. Place the rifle on a table in front of you with the bolt still open. Place the other magazines in the pouches or on the table.
NOTE: The reason you start with the bolt locked back is to simulate running out of ammo for the first reload–which forces you to release the bolt to chamber a round. Locking the bolt back on set-up is different from live fire…but it adds realism during the execution of this drill.
PROCEDURE: Pick up the rifle and confirm safe. Switch to “FIRE.” Place two rounds into an imaginary target in front of you, switch to “SAFE.” FIRST RELOAD: Press the mag release to release the magazine. Pick up and insert the new magazine into the magwell. Press the bolt release (paddle) to chamber a new round. Switch to “FIRE.” And place two rounds into an imaginary target in front of you. Switch to “SAFE.” SECOND RELOAD: Press the mag release to release the magazine. Pick up and insert the new magazine into the magwell. Switch to “FIRE.” Place two rounds into an imaginary target in front of you. Switch to “SAFE.” UNLOAD: Release the magazine. Pull the charging handle to eject the round and verify the chamber is empty. Release the charging handle and close the dust cover.
STANDARDS: 1. Were the magazines fully seated? 2. When reloading, did the magazines drop as you pressed the mag release? 3. Did a round eject as you pulled the charging handle? 4. Is the chamber empty after unload? 5. Did you successfully release the bolt on the first reload? 6. Did you fire immediately without attempting to release the bolt during the second reload? **7. Did you properly unload the rifle? 8. Is the dust cover closed? If you answered “no” to any of these, slow down and/or practice each standard individually until you get it right…and always remember, when unloading, remove the source of ammunition first.
FIRST ATTEMPT: Start slowly and just concentrate on proper technique. Once you get the hang of it, set your timer for 50 seconds and concentrate on proper from. As you learn the drill reduce the time on the timer.
MASTERY: Perform this sequence correctly in under 25 seconds ten times in a row. You can use a shot timer and set the par time to 25 seconds to confirm.
TIP: PRIMARY 2 can (and should) be tailored into a more basic drill. Just focus on the reload without using dummy rounds. You’ll need a rifle and two or three magazines. Start with a magazine inserted into the rifle. Release the magazine and insert the new magazine into the magwell. Release the magazine and insert the new magazine into the magwell…and so-on. Practice this over and over to drastically speed up your loading and reloading times. You can also add slapping the paddle to the sequence to simulate releasing the bolt.
NOTE: Together, CORE 1 and CORE 2, along with PRIMARY 1 and PRIMARY 2 are all about muscle memory and provide you with a strong foundation to meet your training goals. Refer back to them as needed to maintain that strong foundation.
Good luck, and always remember, train hard and stay safe.
VIDEOS:


ADVANCED/EXPERTS:

Maintain the same repetition outlined above and tailor your training to your specific focus. Firearms skills are very perishable and demand repetition.
DRILLS:
ADV/EXP
As you advance and become comfortable with your rifle, be wary of over-confidence and complacency. Missing and/or skipping steps can have serious consequences.
Continue practicing the CORE and PRIMARY drills to stay sharp…they’re a key part of everything you do with the AR platform.
At this point, the 4 basic rules of safety should come naturally. If you are a military or LE professional, you have gone through some training and probably have qualification requirements. Use these drills to enhance your advancement and to stay sharp.
The first drill, the ADVANCED drill, is for those that want to use their AR platform for more than just a few trips to the range every year. If your goal is to defend your home, instruct, compete, or advance in military and law enforcement….this drill will help.
Remember technique, then speed. What good is speed if you’re doing the wrong thing? Mastery is only gained through careful study and accurate repetition of the correct technique. As you advance into more complex focus areas technique becomes even more critical.
The EXPERT drill is all about maintaining your high level of proficiency…which comes from accuracy and repetition but also requires recency.
The law of recency…simply says that more recent experiences tend to be clearer in the mind.
Experts are highly specialized and must continually train to remain among the best. At this level I’m really not teaching you anything new — Instead I’m teaching you about recency — which is critical — you must have trained recently to meet the standards of an expert — even if you’ve met them before. After a break in training, the RedCat helps you get your reps in and get BACK to peak proficiency.
The drill itself is not complicated…in fact, it’s the simplest drill in the series and can be performed anywhere, anytime.
When you’re ready, give the ADVANCED and EXPERT drills a shot. Good luck, and always remember, train hard and stay safe.
In this drill, “manual of arms” is critical, but it’s not the focus. Look outward…to the threats around you…the true focus is your situational awareness…beyond the rifle.
PURPOSE: Add complexity and movement. Provide a bridge to transition from the CORE and PRIMARY drills to the focus areas later in this series.
GOAL: Through complex movements, establish the muscle memory to quickly and safely engage targets while maintaining situational awareness.
SET UP: Rifle with the RedCat installed and two magazines. Dummy rounds are optional. Use three sets of two targets 15ft – 30ft away. Use a barrier (which could be anything) and…of course…your timer. Position each set of targets about 15 ft away from each other. Make sure the last set of targets is around that barrier. This drill loosely simulates enemy contact while on patrol, where you’d have a round chambered and the rifle on SAFE.
PROCEDURE: Start facing away from the first set of targets with the rifle on SAFE and at the low ready. Turn, raise the rifle, switch to “FIRE” and engage the first set of targets. Switch to SAFE, go into the prone position and transition to the second set of targets. Switch to FIRE and engage the second set of targets. Switch to SAFE, get up, reload, go to high ready and move to the third set of targets. Use the barrier as cover. Raise the rifle, switch to FIRE and engage the last set of targets as they come into view. When finished, switch to SAFE and bring the rifle back to low ready.
STANDARDS: 1. After you raised the rifle and turned to the first set of targets, did you switch the safety selector to FIRE? 2. Did you switch to SAFE before you went to the prone position? 3. As you rose, did you execute the reload then switch to FIRE to engage the second set of targets? 4. Did you switch to SAFE before you got up and moved to the third set of targets? 5. Did you use the barrier as cover? 6. Did you engage all six targets? 7. Did you re-engage the safety as you lowered the rifle? 8. Did you focus on your situational awareness as you ran through the drill?
FIRST ATTEMPT: This drill requires mastery of the CORE and PRIMARY Drills…and takes a lot of practice. At first, concentrate on proper technique…but as you get the hang of it, shift your focus outward to the targets around you. Once you get the hang of it, set your timer for 45 seconds but continue to concentrate on getting the sequence exactly right. As you improve, reduce your work/par time. If you are using an interval timer, set the rest time to 20 seconds or more to give you time to set up for the next drill.
MASTERY: Performing this sequence correctly in under 18 seconds ten times in a row.
NOTE: Technique is important…but make sure you focus outward to expand your situational awareness…that’s the point of this drill.
Good luck and remember, train hard and stay safe!
NOTE: This exercise is not about showing off, or about teaching you something new or exotic…or useless. This drill is about two things…..expediency and recency.
PURPOSE: Maintain high proficiency and muscle memory long-term.
GOAL: Experts know that they must train regularly to stay sharp. This is a simple drill designed to keep you sharp anywhere…in your garage, at work, on duty or on deployment…especially when more formal training is not available.
SET-UP: You only need your rifle and the RedCat.
PROCEDURE: Unload and clear your rifle. Install RedCat. With your upcoming training, missions and event(s) in mind, pick objects around you to simulate targets you may encounter. Start on “SAFE” and at the low ready. Bring the rifle to bear on the first set of targets, switch to “FIRE,” engage. Switch to “SAFE,” transition, switch to fire, engage. Repeat until all targets engaged, back to “SAFE,” back to low ready. When complete, remove RedCat. Add empty magazines to practice manual of arms procedures such as loads, unloads and reloads.
CAUTION: If you are in a deployed or on-duty environment, you may need to unload and clear your rifle before conducting the drill.
TIP: To help ensure the RedCat is removed (by adding an indication that the RedCat is installed) here are two techniques you can use.
– Use a piece of scotch tape (or something similar). Tape one end to the inner cavity of the RedCat on the left side and allow the other end to protrude out the left side. Close rifle and allow the tape to stick out of the left side of the rifle between the upper and the lower. This will remind you the RedCat is installed.
– Tie a string or a piece of tape on the trigger guard or the hand-guard. This will remind you the RedCat is installed.
WARNING: Upon completion, ALWAYS make sure you remove the RedCat and return your rifle to proper configuration.
STANDARDS: 1. As you raised the rifle, did you switch the safety selector to fire? 2. As you transitioned, did you use the safety switch? 3. Did you engage all targets? 4. Did you re-engage the safety as you lowered the rifle?
FIRST ATTEMPT: n/a
MASTERY: n/a…this drill is designed to safely and conveniently maintain your mastery anytime, anywhere it suits you.
Good luck and remember, train hard and stay safe!
VIDEOS:


HOME DEFENSE DRILLS:

Home defense with a firearm is risky…and a good home defense plan goes well beyond the use of a firearm. To minimize risk, these drills emphasize positive threat identification and exact/correct use of the controls.
DRILLS:
DEFENDER
Home defense is a very special category. It’s risky…and a good home defense plan goes well beyond the use of a firearm. To minimize risk, these drills emphasize positive threat identification and exact/correct use of the controls in close proximity to members of the household you aim to defend.
Think of it like a fire drill…an effective home defense plan involves all members of the household and includes many components like answering the door, reinforcing points of access, alarm systems, cameras, secure quick-access storage, escape routes, meeting points, safe rooms, safe words, emergency contacts, first aid, local, state and federal law and more.
One of the main factors to consider is what the political and social climate is like in your local area. Do you live in downtown Portland, a suburb north of Fort Worth or do you live in a small town like Red Field South Dakota? Riots outside your front door might drive a different setup than a quiet town in the northern plains.
The AR platform (with the right ammo) is simple and very effective tool for home defense…..and an awesome responsibility. That responsibility increases if you live with others. Take time to educate all members of the household on their own roles and responsibilities (identifying threats, alerting the household, escaping, rally points, etc.).
WARNING: Whether you use the RedCat or not….PLEASE….take this responsibility very seriously and do your absolute best. These drills will help, but they’re only a small portion of your overall plan.
Protecting yourself and members of a household also comes with great legal and personal risk:
Now, let’s take a minute to talk about some important terms you should know when defending your home with a firearm. These are just basic definitions and you should further research and seek counsel on how these terms apply legally to where you live.
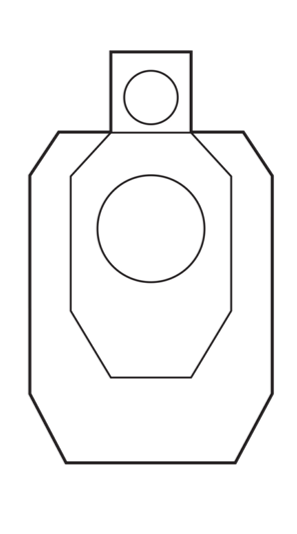
Center of Mass: This is the chest and abdominal area of a person. In a life-threatening situation, such as a home invasion, you should aim for the center of mass. It is a larger area and gives you the best chance of neutralizing the threat.
Warning Shots and Shots Intended to Wound: Legally, this is a bad idea. It opens up the argument that you did not feel truly in fear for your life…therefore, if you fired a warning shot, you committed assault with a deadly weapon. If you shoot to wound, you commit aggravated assault with a deadly weapon causing great bodily harm. Never pull the trigger unless you are truly in fear for your life and must neutralize the threat with deadly force to save your life and/or the lives of your household.
Deadly Threat: You must be in fear of your life as you pull the trigger. If the intruder surrenders or runs, you are no longer in fear for your life and cannot engage. Many variables including multiple intruders will change the dynamic considerably…but you must genuinely be in fear of your life as you pull the trigger.
Legal Liability: Carefully review the local, state and federal laws for your area and consult experts including lawyers and firearms instructors as much as possible. Check information sources like USCCA and Legal Heat (for example) because they have a good run-down of the laws in every state. Laws…and how they are enforced vary greatly across the country. Unfortunately, what is considered self-defense in one area may be considered 2nd degree murder in another. Tailor your training to account for this.
Civil Liability: Most states protect a homeowner from civil liability if the incident is deemed self-defense by law enforcement or by a court…but some don’t.
There are many other terms you should know…including duty to retreat, castle doctrine, proportionality, use of force, legal presumption. These are legal terms and their application vary greatly from state to state.
Home defense is a very special category and requires careful planning and research well beyond the other categories to mitigate the many risks involved. Take the time to do the research.
When you’re ready, get started with the DEFENDER 1 drill. Good luck, and always remember, train hard and stay safe.
PURPOSE: Quickly and safely access your rifle to engage a single intruder.
GOAL: Concentrate on the “mechanics” of safely defending your home as quickly as possible and safely stand down once the threat is removed.
NOTE: Set up may vary slightly depending on your preference. For this exercise, I will go with the rifle in a “cruiser ready” configuration. That means the rifle is on SAFE, a magazine is loaded and the chamber is empty. You may choose to chamber a round or have the rifle completely unloaded. The rest is the same…RedCat installed and the rifle staged on a table. Use one target, a shot timer and two dummy rounds in a magazine. Set up the target so you have to move to it from the starting position.
PROCEDURE: In your training area, stand 5 to 10 yards away facing the opposite direction of your rifle. At the buzzer, turn around and grab the rifle. Confirm safe and rack the bolt to chamber a round. Move to the target, switch to “FIRE” and engage the target. Aim for the center of mass. Target neutralized. Lower the muzzle and switch back to “SAFE.“ Unload and clear your rifle. Set the rifle down in a safe area. Keep the magazine and ammo with you.
STANDARDS: 1. Were you safe and deliberate in all your actions as you engaged your target? 2. Was the rifle properly configured? 3. Did you fire two rounds into the center of mass? 4. After the area is confirmed safe, was the rifle unloaded and the chamber cleared?
FIRST ATTEMPT: Make sure you configure and store your rifle so that it is both safe from accidental misuse and quickly accessible. I use “cruiser ready” (magazine loaded, chamber empty, SAFE) for the drill as a balance between safety and speed. You may use a different configuration (round chambered for speed or completely unloaded for safety) if it works better for your situation. Meticulously go through the drill until the actions of grabbing the rifle and unloading it become second nature. Once you are ready to time yourself set the timer to 45 seconds and decrease the time until you are ready for mastery.
MASTERY: Depending on the training area, this drill should not take longer than 15-20 seconds. You may need to adjust your time depending on how and where you conduct the drill.
CAUTION: Training in your own living spaces with your rifle is not recommended…instead, walk through your living area with a block of wood, a bat or something similar, noting areas of cover, fields of fire and likely places members of your household will be. Simulate them to the best of your ability in a safer area–like your garage.
When you’re ready, get started with the DEFENDER 1 drill. Good luck, and always remember, train hard and stay safe.
PURPOSE: Quickly and safely access your rifle to engage a variable set of intruder(s) and protect a variable set of occupant(s).
GOAL: Accomplish everything in DEFENDER 1 but concentrate on positively identifying and engaging threats and keeping everyone else safe.
SET UP: Cruiser ready” [Safety selector SAFE magazine LOADED chamber EMPTY]. Install the RedCat. Place the rifle on the table. Set up four targets 10ft away from each other, placed around corners and behind barriers if possible. Mark each target A, B, C and D. and have a friend randomly arrange the targets. Use a timer.
NOTE: Rifle configurations will vary depending on your situation and preferences. Tailor this drill to match your configuration.
PROCEDURE: Face away from the rifle. At the buzzer, turn around, grab your rifle, chamber a round and confirm SAFE. Your friend calls out the target(s) (in this example, let’s say “B”). Begin to move toward each target. Identify the first target. Target “A” is friendly. Keep the rifle at the low ready and move on. While still moving, transition to the second and third targets. Identify the targets. Target “C” and “D” are friendly. Keep the rifle at the low ready and move on. While still moving, transition to the fourth target. Identify the target. Target “B” is the intruder. Safety selector – FIRE. Fire two rounds into the target, center of mass. All threats neutralized. Safety selector – SAFE. Once the home is safe unload and clear the weapon and place it on the table. Keep the magazine and ammo with you.
TIP: Vary the intruders and the friendlies each time you practice this drill. Call out multiple intruders as well…just make sure to leave at least one target as a friendly.
STANDARDS: 1. You were safe and deliberate in all your actions? 2. Did you properly identify, engage and neutralize the target(s)? 3. Did you place two rounds into the center of mass? 4. Did you safely handle your weapon in front of friendlies? 5. After the area is confirmed safe, was the rifle unloaded and the chamber cleared? 6. did you keep the magazine and ammo with you?
FIRST ATTEMPT: Set up you rifle to simulate that it is stored to prevent accidental misuse and is quickly accessible. Meticulously go through the drill until the actions of grabbing the rifle, loading it and unloading it become second nature. Once you are ready to time yourself set the timer to 45 seconds and decrease the time until you are ready for mastery.
MASTERY: Depending on the training area, this drill should not take longer than 15-20 seconds. You may need to adjust your time depending on how and where you conduct the drill.
CAUTION: When training with your firearm, do this drill in your garage, not in your home. Inside you home, use a block of wood, a bat, etc. and focus on cover, concealment, fields of fire and clearing.
When you’re ready, train with the DEFENDER 2 drill. Good luck, and always remember, train hard and stay safe.
VIDEOS:


COMPETITION DRILLS:

Set up mock stages that resemble a 3 GUN or a USPSA match. Both drills use dummy rounds and require loading before the drill and unloading after the drill.
DRILLS:
COMPETITION
AR platforms are the “go-to” choice for shooters competing at the local and national level in events including 3 Gun and USPSA.
The original idea for the RedCat actually came from a 3 gun match. Early on, as a competitor at a local match, I had just moved from the rifle portion of a stage to the pistol…but before I got too far along, the Range Safety Officer said “stop…unload and show clear” and I knew something was wrong…after I cleared my pistol, he said, “let’s go back to the AR and take a look.” I immediately knew my mistake. I left my rifle on FIRE and there was a round in the chamber. I was disqualified from the match and learned about the importance of dry fire training that day. My first solution was to build a “training” rifle with the hammer removed. That worked…but it cost me $3,000.00. A few years later I developed the RedCat…and got the same benefit…and the cost is $20.00.
…A decent bang for your buck, I’d say.
Competition shooting is a balance between speed and accuracy. Each stage is timed—and the object is to hit a combination of targets as fast as possible. Dry fire training is an essential component of training if you want to be competitive…and training with the RedCat can be a tremendous advantage.
COMPETITION 1 is two sets of two targets and a reload. To shave off some time, competitors usually reload before running out of ammo. Reloading while transitioning between target sets saves time by combining actions and by negating the need to release the bolt. Eliminating and combining steps will improve your results in a competition.
COMPETITION 2 focuses on the transition between the rifle and the pistol. Make sure you SAFE the rifle before you dump it and unholster the pistol.
TIP: When you master these exercises add complexity to them using what you see in competitions to set up “stages” similar to what you will encounter in a competition in your garage.
NOTE: Your score will be based on the time from the buzzer to your last shot–recorded by a shot timer. Once you fire your last shot, the stage is complete. Unloading and showing clear is not counted. These drills will reflect that.
NOTE: Before you set up these drills, thoroughly review the rules for the competition. There may be specific requirements like emptying the chamber. If there are, make sure you tailor the drill to follow them when you dry fire.
CAUTION: Attention to retail is critical in competition. Failure to account for the specific rules of the competition will result in stiff penalties that may include immediate disqualification from the match. Reading and understanding the rules will also reveal techniques you can practice and use to your advantage in competition.
When you’re ready, get started with the COMPETITION 1 drill. Good luck, and always remember, train hard and stay safe.
PURPOSE: Learn to balance speed and accuracy in a more complex stage.
GOAL: Create good training habits to prevent penalties or disqualification and to improve your scores.
SET-UP: Note the 180-degree plane. Use six targets (three sets of two targets). Position the first set of targets toward the front of the range. Position the second set of targets behind the first set to prompt movement around the first set. Position the last set of targets around a corner or barrier. Make sure the targets are set up so you don’t break the 180. Load two magazines with two dummy rounds each. Configure the rifle [Safety selector SAFE, magazine LOADED, round CHAMBERED]. Have the second magazine on your person or staged at the reload location to perform a reload.
PROCEDURE: Start facing the first set of targets, with the rifle on SAFE and at low ready. On the buzzer, raise the rifle, switch to FIRE and engage the first set of targets. Switch to SAFE and move past the first set of targets to the second set of targets. Switch to FIRE and engage the second set of targets. Switch to SAFE and move around the barrier to the third set of targets. Reload as you move. As the third set of targets come into view, raise the rifle, switch to FIRE and engage the targets. The drill is complete once you fire your last shot. Switch to SAFE as you bring the rifle back to low ready. Unload and show clear.
STANDARDS: 1. As you raised the rifle, did you switch to FIRE? 2. As you transitioned, did you use the safety switch? 3. Did you engage all six targets? 4. Did you re-engage the safety as you lowered the rifle each time? 5. Did you complete the reload as you moved from the second set of targets to the third? 6. Were you safe and deliberate in all your actions. 7. Did you properly unload and show clear?
FIRST ATTEMPT: Start with 45 seconds. As you practice, eliminate and combine any steps that are unnecessary.
MASTERY: Performing this sequence correctly in under 15 seconds ten times in a row. Considering each task, this is a fast time…take the time to make sure you combine steps and eliminate unnecessary steps. You’ll need to do this to some extent to meet the time for mastery of this drill.
TIP: look for opportunities to combine and eliminate unnecessary steps in this and any competition drill you conduct.
When you’re ready, get give COMPETITION 1 a try to improve your score. Good luck, and always remember, train hard and stay safe.
PURPOSE: Learn how to set up for multi gun events and learn how to improve your scores by combining steps and eliminating unnecessary tasks.
GOAL: Create good training habits for competition. Prevent penalties or disqualification.
SET-UP: Use two sets of 3 targets in two rows 15ft – 30ft away. Position each set of targets about 15 ft away from each other. You will use your rifle and a pistol for this drill. Some pistols have a safety selector and some do not. Load one magazine with two dummy rounds into your both rifle and pistol. Chamber a round for each and switch to “SAFE.” Place the pistol in your holster or on a table in front of you. Hold the rifle at the low ready.
PROCEDURE: Start facing the first set of targets, with the rifle on “SAFE” and at the low ready. On the buzzer, raise the rifle, switch to “FIRE” and engage the first set of targets. Switch to “SAFE” and place the rifle on the table. Grab the pistol from the table or from your holster and aim at the second set of targets. If equipped, switch the safety selector to “FIRE” and engage the second set of targets. The drill is complete once you fire your last shot. Switch to “SAFE” (if equipped) as you bring the pistol back to low ready and stop the timer. Unload the pistol, show clear and place the pistol on the table or back into your holster. Unload the rifle, show clear and place the rifle on the table.
TIP: many competition pistols are not equipped with a safety switch. This can be a slight advantage because it automatically eliminates a step while you’re competing. Take advantage of every opportunity to eliminate steps you can in a match.
STANDARDS: 1. As you raised the weapons, did you properly use the safety selector(s)? 2. As you transitioned, did you did you use the safety selector(s)? 3. Did you engage all targets? 4. Did you re-engage the safety as you lowered the weapons? 5. Were you safe and deliberate in all your actions? 6. Are the weapons unloaded and cleared?
FIRST ATTEMPT: Start with 45 seconds. As you practice, eliminate and combine any steps that are unnecessary.
MASTERY: Performing this sequence correctly in under 10 seconds ten times in a row.
Remember, look for opportunities to combine and eliminate unnecessary steps using this drill. When you’re ready, give COMPETITION 2 a try to improve your score. Good luck, and always remember, train hard and stay safe.
VIDEOS:


MILITARY, POLICE AND GROUP DRILLS:

The RedCat is suited for individual and group settings of all types. The RedCat is also ideal for team rehearsals. With the extensive guidance and wide variation of exercises possible, it would be impractical to suggest specific exercises in this section. Instead here are two broad focuses the RedCat would be ideal to employ.
DRILLS:
MILPOL
Military and Law enforcement serve in a wide range of duties and the AR platform is used extensively in many of these, including basic manual of arms, recon, patrols, force protection, CQB, convoy escort, security, drug interdiction, CSAR, assaults and more…and covering all of these is beyond the scope of this series. With that in mind, I designed these drills so they increase situational awareness across a broad range of these purposes.
Some of the most consistent feedback I get is from instructors. Something along the lines of…it’s great to know the RedCat is installed in the rifle while we’re working in the classroom….we’re free to practice any way we want…in a safe environment.
When I designed this series, I thought of the many agencies in military and law enforcement that don’t get the full amount of training that they need. Imagine for a second a law enforcement officer on duty reaching for his or her AR. Doing so means that the situation has deteriorated very quickly. Lives are at steak and fractions of a second mean the difference between life and death. Due to limited resources, many agencies, especially smaller law enforcement agencies, don’t have the resources to adequately train on the AR platform…leaving servicemembers and police officers at a disadvantage. The RedCat is an affordable option to help fill that training gap.
MILITARY, L.E. and GROUP 1 focus on using the RedCat during formal and informal group training and rehearsals, so you and your team have the realism, safety and situational awareness to concentrate on more the advanced aspects of your mission.
MILITARY, L.E. and GROUP 2 is a broad template for running group drills and exercises a classroom using the RedCat and dry firing with the AR platform.
WARNING: The RedCat renders the rifle inert. It is highly recommended your team establishes a process to ensure the RedCat is installed and removed deliberately and at the correct time to ensure your rifles remain properly configured during training and during the mission.
NOTE: You should tailor these drills with your team to practice specific techniques including fundamentals, target ID, neutralizing targets, turning procedures, target transitions, trigger and sight management, shooting while moving, communication, fields of fire and more.
NOTE: Don’t miss the opportunity to do these drills on an individual basis. Rehearsing how you will run your classroom beforehand makes you smooth and deliberate while in a lead role with your new arrivals. It’s is time well spent.
When you’re ready, get started with the MILITARY, L.E. AND GROUP 1 drill. I’m really excited about bringing an affordable option to those that serve. I am deeply thankful every day for your service. Good luck, and always remember, train hard and stay safe.
When I left active duty I found myself in what felt like a parallel universe…one where ammo doesn’t grow on trees…where resources have limits. One example is shoothouses across the country (especially those within smaller agencies) going ammo-free. The RedCat is ideal for training gaps like this.
PURPOSE: Enhance realism during training and rehearsals—saving ammo and increasing situational awareness for you and your team. Don’t over think it…what I’m telling you here is to — just add the RedCat.
GOAL: Have teams use the RedCat during group training leaving room for you and your team to focus on tactics and situational awareness.
SET UP: Make preparations as the unit sees fit…which may include the basics (just the rifle and the RedCat) or go well beyond. Use all the same equipment and facilities you have at your disposal…from a pen to a UH-60 Blackhawk…just add the RedCat during the dry-fire rehearsal portion of the training.
PROCEDURE: Use the RedCat to take away one non-realistic aspect of the AR platform: the safety switch locking on the trigger pull…and to add the ability to work with dummy rounds. This will allow the AR to blend seamlessly into your training so you can focus on other more dynamic areas of the mission.
TIP: Before the drill, review and practice EXPERT 1 on an individual level. This is a simple drill designed to keep you operating at a high level and is exceptionally well suited for military and law enforcement.
NOTE: This drill is broad and tailorable to your specific TTP. Use it for beginners, experts, new arrivals and large groups. For the STANDARDS, FIRST ATTEMPT and MASTERY, use your unit’s standard operating procedures and best practices to evaluate your success and identify areas of improvement.
WARNING: Upon completion of training, it is recommended that leaders/instructors specifically instruct the group to remove the RedCat and configure their rifle as mission dictates.
Good luck and thank you for your service. Train hard and stay safe!
Students come in all shapes and sizes…but beginners and experts alike will face unfamiliar procedures and equipment that are used in conjunction with the AR platform. Use the RedCat to safely train on missions and equipment where the AR platform is involved. It’s cost-effective and adaptable….making it suitable for instructor led group training of all kinds.
PURPOSE: In a group setting, demonstrate and teach the basic functions of the AR platform to your students.
GOAL: Familiarize students with the AR platform. Teach students the importance of dry firing and encourage them to dry fire on their own.
SET-UP: You need the RedCat, a couple of Magazines and some dummy rounds. Before you conduct the class, go through your lesson plan and look for areas that the RedCat will enhance safety and learning. Rehearse how you will have students install the RedCat and then familiarize themselves with the AR platform.
PROCEDURE: Unload and clear the rifle. With the RedCat removed, demonstrate the issue with the safety switch: Have the students aim, switch to FIRE, engage the target and try to switch back to SAFE. Explain the issue. Have the students install the RedCat. Run through the same sequence. Explain how the rifle operates and have them practice. Use magazines and dummy rounds to run through the manual of arms tasks including loads, reloads and unloads. If your class includes range time, practice with the RedCat before the range goes hot.
TIP: Take advantage of training opportunities while the rifle is inert, yet fully functional.
STANDARDS: There are not really standards for this drill. Use any standards associated with your curriculum as applicable.
FIRST ATTEMPT: This drill is more of a dry run or a walk through. Just focus on preparation for your class as if you were finalizing a lesson plan.
MASTERY: There is no criteria for mastery. What you’re trying to do is teach in a safe environment and encourage students to practice on their own. Students gain an understanding of the differences in how the controls operate during dry fire training and the importance of effective dry fire training.
Good luck and remember, train hard and stay safe!
VIDEOS:

FINAL THOUGHTS:

BASIC
Before we wrap up this series, I want to dive a little deeper into the importance of training to develop muscle memory. What does dry fire training do and why is it so important?
The short answer is muscle memory.
Muscle memory is not about storing information in your muscles…there are no neurons there. It’s about storing information in your brain…emphasizing technique, then speed.
Practicing correct techniques repeatedly gets the right information into the right areas of the brain so you can act when seconds count.
Here’s the basics: You familiarize and form your understanding of the information through the cerebral cortex. You refine your actions through the cerebellum. With dry fire, you repeat what you learned as it’s recorded in the amygdala for fast recall.
Cerebral Cortex: Where complex thought occurs…where you break down and analyze every action in detail.
Cerebellum: Responsible for the fine-tuning. As you begin to practice, it constantly compares where you are to where you should be and makes the fine adjustments…setting you up to connect the final dot…the amygdala.
Amygdala: Where your brain goes for quick reaction to emergencies and to danger. Once you have the exact sequence down and begin to repeat it the amygdala records the information so that later you can react quickly and instinctively. Think of when a first responder says something like they don’t remember what happened exactly…the training just kicked in…that’s the amygdala.
For these dots to connect, the essential components of training are accuracy, repetition and recency.
Accuracy: In order for the repetition to be effective it must be accurate. This requires constant study and, at times, corrective actions to eliminate bad habits that may develop over time.
Repetition: In order for the information to be recorded into the amygdala the actions must be repeated.
Recency: Over time, recorded information in the amygdala degrades and gets overwritten. The more complex the information, the more recent it will need to be.
Building muscle memory is the business at hand…that comes from proper training–proper training requires accuracy, repetition and recency.
This is what the RedCat was built for.
I’m very excited that you’re interested in improving your skill level hope you enjoy this training as much as I enjoyed putting it together. I’ll end the same way I started…Peter Parker’s quote…with great power comes great responsibility.
Train hard and stay safe!